Thursday, 21 September 2023

NEEDLE CASE and CARD EMBROIDERIES

NEEDLE CASE

So what else have I been up to recently? Well a lovely friend gave me a kit to make a needle case which had a lovely picture on it but I forgot it was heat erasable and stupidly ironed out the creases on the cloth which erased the picture as well!! Honestly I don’t know how I could be so silly. Anyway I managed to copy most of the picture and was pleased with the result in the end.😊


Then Pinterest inspired me to have a go at embroidering cards with a little bit of lace embellishment which were fun little projects but take a little while to sew…

   
Why not have a go yourself - be inspired.😊x


TINY TEDS, BUNNIES ELEPHANTS


TINY TEDS  I still love making tiny teddy bears as they’re just so cute, so here are the latest.


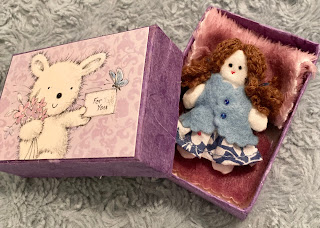
They’re great for fitting in little match boxes which everyone loves to open to see what’s inside! They’re good for stocking fillers, or just to send to someone who needs cheering up for some reason. Most people enjoy a teddy bear and they can fit in a pocket for a child to keep them company.

Tiny elephants are adorable too, so I made one and gave it away as well as some of the tiny teds. Wished I’d kept little Elle now, it was so cute!😊


All in all tiny teds and elephants are great fun!😊 Hope you like them.

Then it was time for the bunnies to appear - lots of work but so pretty to play with.


And a little dog… I think I’ll call him Hamish.😊


We’ll, that’s all the tinies for the moment - until next time….


NEW RAG DOLLIES FOR 2023

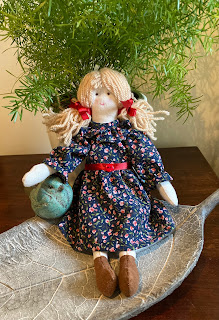
 Earlier in the year another friend asked for more rag dollies as they seem to be so popular with her grand daughters and herself! It seems grown ups enjoy them too!😊 And here they are…


One of them is being enjoyed in Hong Kong so hope she can speak Chinese!🤣🤣


MINI CUSHIONS

 I’ve been busy working on several different projects over this past year so thought I would put up some new photos to show you what I’ve been up to.😊

Last Christmas I made two mini cushions for a friend and had great fun designing them to her colour scheme.


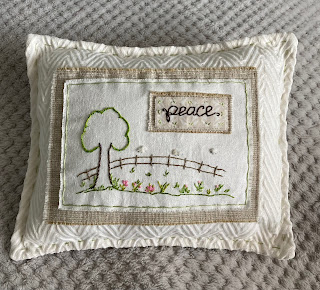
Then a few months ago I wrote about Peace in my other Blog:  myberrythoughts.blogspot.com  https://myberrythoughts.blogspot.com/2023/07/leave-trail-of-peace.html and showed a cushion I had made. One kind friend asked if I took commissions so I’ve made a couple of new ones to show to her to see if she might like one.


This is the original one.

And the new one is all hand embroidered as well…but can’t show the other one yet as it’s a surprise for her and she might see it here!😊 


.


Tuesday, 23 August 2022

Tiny Rag Dollies


I’ve been making tiny rag dollies and having a lot of fun. They measure under 2” and are very cute. Hope you like them .😊

Monday, 19 July 2021

TINY TEDDIES


I haven't written on this blog for sometime so thought I'd share some photos of tiny bears I've been making for gifts. These ones have been playing in the forget me nots!

They make lovely little gifts and are small enough to fit in an envelope with a gift card and still go in as large letter as long as you don't stuff them too thick!

Adults enjoy them as much as children and if you add a ribbon they could attach to a handbag or something similar
.
I got a bit addicted to making them and kept looking for more odd pieces of cloth as they use so little!


Three sizes but you can make them any size you like. Really big if you prefer!


If you want to make them Pinterest has lots of free teddy patterns to draw around or just draw a basic teddy shape on paper. Don't make the legs long though as they look better with stubby legs I think.

I pinned the pattern to a folded over piece of t shirt cloth or any cloth that doesn't fray easily, like felt. Don't cut the pattern out as they're too small but just place the cloth with the pattern pinned to it in the sewing machine and stitch all the way round very slowly round the curves. Leave a gap for turning and make sure to back stitch at each end so it doesn't unravel.  

Turn right side out carefully so as not to stretch stitches as they are quite small bears. Stuff lightly using a coffee stirring stick or something similar to push the wadding in.  Then hand sew the gap with tiny stitches. I made the stuffing  gap where the arm would be sewn on, so my stitches wouldn't show. Hope that makes sense.

My pattern had no arms as I found it easier to sew the whole bear then add little felt arm shapes afterwards. I prefer to sew the face after it's sewn so I know which side of bear looks better.

You can practice a few basic ones just using one colour but then progress to two colours if you like.

For my first one I used old pyjamas with a pattern on and then embroidered all the details in afterwards. A bit fiddly but she looks pretty! That's the pink flowers and bow one.

For the scarf take a bit of t shirt strip of cloth, less than 1 cm wide, stretch it so it goes rolled over on itself, cut a length to go round teddy's neck and tie in knot. Or just use a bit of  wool.

As I say, just draw a bear shape, or use template above in different sizes and make sure your cloth is folded over so the nice side is inside before you cut.

Hope  you give it a try.

Friday, 17 July 2020

Ragdolly 3

Ragdoll3 shows how the same pattern can turn out quite differently with different hair and although I thought I'd made her the same size she is fractionally bigger than No.1!